Fabulous Mom Life

Travel, Lifestyle. Parenting, Education, Mom Style & Family Life

Navigation
  • Decor
  • Entertaining
  • Style
    • Beauty
    • Fashion
    • Kids Fashion
    • Makeup
  • Mom Life
  • Homemaking
  • Education
    • Early Learning
    • Higher Education
    • School Life
  • Wellness
  • Travel & Outdoors
    • Foodie Family
    • automotives
  • Shopping
  • Entertainment
    • TV
    • Books
  • Children’s Health
  • Playtime
  • Work & Finance
  • Relationships

DIY Tinted Lip Balm

January 2, 2024 1 Comment

Making tinted lip balm at home can be a fun and creative project. Here’s a simple recipe for a DIY tinted lip balm:
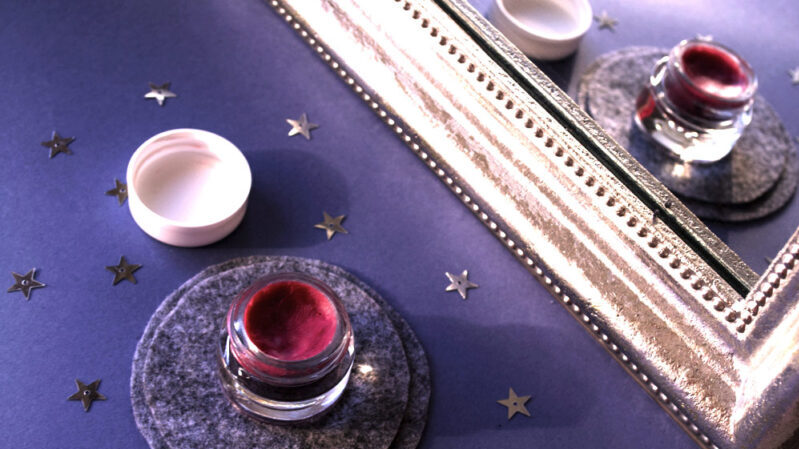
DIY Tinted Lip Balm

Ingredients:

  1. Beeswax pellets or grated beeswax (1 tablespoon)
  2. Coconut oil or sweet almond oil (2 tablespoons)
  3. Shea butter (1 tablespoon)
  4. Cocoa butter (1 tablespoon)
  5. Beetroot powder, raspberry powder, or other natural colorants (adjust to achieve desired tint)
  6. Essential oil for fragrance (optional, like peppermint or vanilla)
  7. Small lip balm containers or tubes

Instructions:

  1. Prepare Work Area: Ensure that your workspace is clean and sanitized. Gather all the ingredients and equipment.
  2. Melt the Base: In a heat-resistant container or a double boiler, melt the beeswax, coconut oil, shea butter, and cocoa butter together. Stir the mixture until everything is completely melted.
  3. Add Color: Once the base is melted, add your natural colorant (beetroot powder, raspberry powder, etc.) to achieve the desired tint. Start with a small amount and adjust until you achieve the color you want. Mix well to distribute the color evenly.
  4. Add Fragrance (Optional): If you want to add fragrance to your lip balm, you can add a few drops of essential oil at this stage. Peppermint or vanilla are popular choices.
  5. Pour into Containers: Carefully pour the melted mixture into your lip balm containers or tubes. Work quickly, as the mixture may solidify as it cools.
  6. Cool and Set: Allow the lip balm to cool and set completely. This may take a couple of hours. Once set, you can cap the containers.
  7. Labeling (Optional): If you’re making different shades, consider labeling your lip balm containers with the ingredients used or the shade name.
  8. Usage: Apply your tinted lip balm as you would with any other lip balm. Enjoy the moisturizing properties along with a hint of color.
See also  The Science of Healthy Hair: Essential Practices for Strong, Beautiful Locks

Note: The quantities mentioned are approximate, and you can adjust them based on your preferences. Additionally, the color intensity may vary, so it’s a good idea to start with a small amount of colorant and add more if needed.

Share this:

  • Share on WhatsApp (Opens in new window) WhatsApp
  • Share on Facebook (Opens in new window) Facebook
  • Share on X (Opens in new window) X
  • Share on Pinterest (Opens in new window) Pinterest
  • Email a link to a friend (Opens in new window) Email

Filed Under: Beauty Tagged With: beauty recipes, diy beauty, lip balm

« Embracing Sustainability in the Desert: Exploring Innovative Architecture in Phoenix, Arizona
Unexpected Cold Snap? Here’s What to Do Next »

Comments

  1. Molly | Transatlantic Notes says

    January 5, 2024 at 12:54 pm

    I love the idea of a tinted lip balm like this as I generally don’t particularly like lip stick and how it feels. Making this does not sound too difficult, and I love the natural elements too!

    Reply

Leave a Reply Cancel reply

Your email address will not be published. Required fields are marked *

Hi! Lovely to meet you! I am Lata, mommy to 3 kids and married to my soulmate. I blog about my everyday mom life, travels, books, fashion, homemaking, decor, hobbies and everything else that goes on! Read More About Me …

Top Posts & Pages

  • Vegetarian Indian Meal Plan for a Month - Week 1
  • Bollywood Songs Filmed in Beautiful Italy
  • DIY Fancy Dress / Halloween Costume Ideas for Kids
  • Best Costa Rica Coffee Brands, Cacique Guaro and Other Souvenirs to Bring Home
  • South Beach on a Shoestring: Cheap Eats That Locals Love (All Under $15)
  • 50+ Paratha Stuffing Ideas
  • How to Explore South Beach in 1 Day on a Budget
  • How Can You Make Breakfast Foods Healthy and Yummy for Kids #63PercentMoreProtein
  • 12 Homemade Indian Face Packs for Glowing Skin
  • Exploring the Pretty Houses of Key West: A Colorful Journey Through History and Charm

Subscribe to my posts

Enter your email address to subscribe to my blog and receive notifications of new posts by email.

What’s New

  • My First Evening in Paris: I Went Looking for Peace at Canal Saint-Martin and Found the Whole City
  • 7 Signs Your Spouse May Be Hiding Income During Divorce
  • 5 Situations That May Constitute Malicious Prosecution
  • How to Ensure Proper Service in a Divorce Case
  • Why Court Is Not Always the Best Option for High Asset Divorces
  • Building Personal Style Through Everyday Jewellery 
  • Monthly money habits that make family life easier
  • Easy Wig Hairstyles for Busy Moms: Look Put Together in Minutes
  • Small Front Garden Upgrades That Make a Big Impact
  • The Benefits of Raising Kids in a Vibrant Cultural Hub
  • About
  • Kids Party Ideas

Copyright © 2026 · Foodie Child Theme by Shay Bocks · Built on the Genesis Framework · Powered by WordPress